Happy first day of August! With these last few weeks before school starts, we wanted to share a fun project for those parents looking for an easy summer art project. It's simple, fun, and requires only a few supplies. Plus, kids can use their hands and smush paint…so fun and tactile! And once they're all done, you'll have a colorful new piece of artwork to hang on the wall. Here's how to make it…
You'll need…
– mixed media paper
- acrylic paint
– paint brush
– plastic wrap
Here's how…
1. Add dots of paint randomly, wherever you'd like across your paper.
2. Once you've added all the colors you like, gently lay plastic wrap on top of the paint and press with your hands to spread out the paint.
3. If you'd like to smooth out any large globs of paint that remain, you can use a brush over the plastic wrap to gently push the paint outwards.
4. Carefully peel back the plastic wrap, and let your artwork dry for at least 4 hours, or overnight.
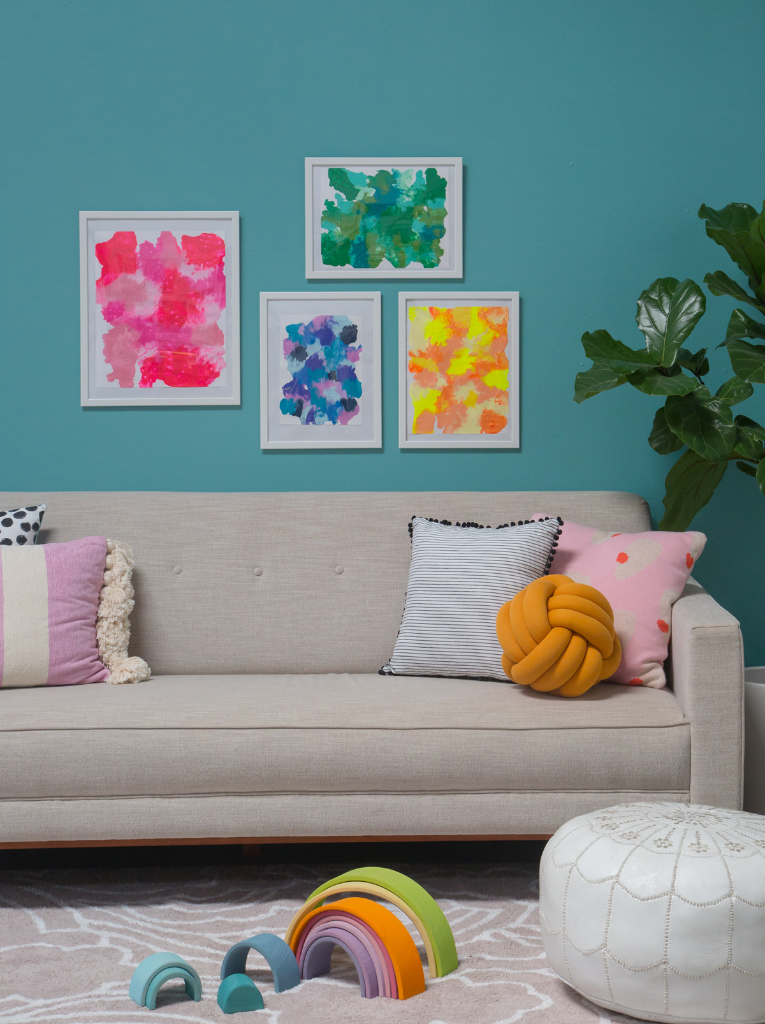
Voila! You can even frame your kids' pieces of art for your own home or to give to friends and family as a homemade gift they'll love!
P.S. Turn your kids' instant photos into art, too.
Sources shown: Benjamin Moore Florida Keys Blue paint, Joybird couch, Juju & Jake small knot pillow, Arro Home dotty pillow, Anthropologie purple stripe pillow, Calhoun & Co. black striped pillow, Arro Home pink abstract pillow, Juju & Jake large knot pillow, Oh Joy x Lorena Canals rug, Arcade wooden rainbow toy, Moroccan pouf (similar).
{Photos by Lily Glass. Styling by Wilmarose Orlanes, styling assistance and crafting by Jess Hong.}
good
I had no idea that this was possible! This lucks fun.
So fun! What frames do you use?
what a great idea!! and yes, where are the frames from? 🙂
They look like classic (and inexpensive!) iKEA frames. So cute!
Skedaddled with the 2 y o to Target this morning to buy plastic wrap so we could do this on an oddly drizzly summer afternoon, and she and my 4 y o had a BLAST. Next time I’ll grab a few more colors of paint so we can try the tonal look, because while yours are frameable, ours are definitely save-in-a-drawer art 🙂 Suggestion: if doing this with smallish paper, making a plastic-paper-plastic sandwich and sealing the two plastic edges together makes it a lot easier to avoid paint squishing out the edges and onto your dining room table!
I’m an adult with no kids at all and I think this is such a cute art idea. Like I might even do it myself. Thanks!
Yes! It’s very therapeutic!
Joy
Walmart has these frames. Relatively inexpensive.
Thanks Theresa!
Joy
Love this painting activity for my ones class in the fall.
Thank you for sharing.
Connie
Thanks Connie!
Joy
Can this be done directly onto canvas?
Just did this with my students. They loved their art pieces!!
Thank you for sharing.
So glad! Thanks Carla!
Joy
This is so cool. Thank you so much Carla.
Really neat idea!!
What is the alternative if no more mixed media paper? can I use a long white folder, bondpaper? or specialty paper? recyclable paper at home? any suggestion on that. Thank you.
yes you can use any of those!
oh nice! Thank you.